An Introduction to Fingerstyle Guitar
If you have ever wanted to expand your guitar playing beyond strumming an accompaniment chord part then finger-style guitar is great way to add variety to your playing and a great way to impress your friends too.
In the following article I’m going to talk about some simple techniques to get any guitar player started down the road to finger-style playing and answer some of the most frequently asked questions – FAQS – I get from students learning to finger-pick.
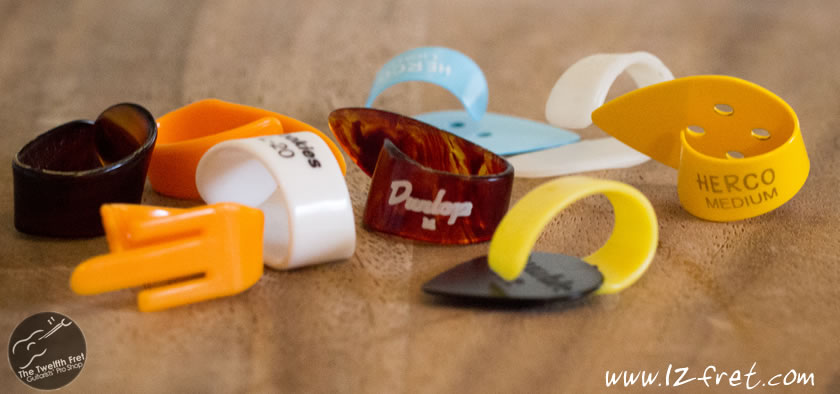
►DO I NEED TO GROW MY NAILS? AND WHAT ABOUT THUMB-PICKS?
I like to tell my students the answer to every guitar question is “it depends” because it usually does. With the exception of serious classical guitar studies (in which you will need nicely shaped and polished nails and definitely no thumb-pick) there really are no hard and fast rules regarding nails and thumb-picks. There are great players who play with just the flesh and great players who play with nails. There are even those doing a bit of both. You’ll see these variations across folk, blues, ragtime, rock, Celtic modern finger-style and just about everything else. There are some common traits in specific styles though that I will cover a bit below.
The most important thing when finger-picking is even tone and volume between the individual fingers and particularly between the thumb and the fingers. What this means is that if you want to play with the flesh of your fingers don’t grow a big thumbnail, or use a thumb-pick because your thumb will be louder than the flesh of your fingers. Of course the inverse is true as well. If you decide on using a thumb-pick it is important to realize up front that you are actually training your thumb to miss the strings as you play so if you are ever without your thumb-pick and want to play it can be difficult to switch gears and play without it. This is a bit like not having a flat-pick when someone wants to hear you play in a regular style, it’s a bit of a handicap.

I KNOW SOME CHORDS; HOW DO I FINGER-PICK THEM CORRECTLY?
►I KNOW SOME CHORDS; HOW DO I FINGER-PICK THEM CORRECTLY?
The general rule I use for beginners is to assign the thumb to the 4th 5th and 6th strings for the bass note and then use the index finger for the 3rd string the 2nd finger for the second string and the ring finger or 3rd finger for the first string. Now let’s put that configuration on an actual first position D major chord. The thumb will play the bass note on the open 4th string and our 3 fingers will play in order the 3rd string the 2nd string and then the 1st string. You want to place all your fingers including the thumb on the strings before you play anything. Then, smoothly and evenly as possible play the fourth string to the first string in order of lowest to highest sounding. Thumb, index, middle, 3rd
Placing your fingers on the strings before you begin – or planting as it is often called – is important here as it serves as a nice handrail. Once you’re set up on the chord you can play through all the notes evenly as opposed to fumbling around between fingers once you’ve started. Take your time fretting the chord and then getting your right hand fingers in position on the strings, then as evenly as possible move through the arpeggio (arpeggio is just a fancy musical term which means the notes of a chord played individually). You will eventually leave the planting behind in most applications but it’s invaluable in the early stages.
Let’s quickly apply this same pattern to another chord this time to first position G major. In this case our bass note is G on the 6th string. We will play this note (which is on the 3rd fret) with our thumb followed by the 3rd 2nd then 1st string we will skip the 5th and 4th strings all together for now on this chord. If we apply this pattern to C major in first position it will be thumb on the bass note C which is the 3rd fret of the 5th string and again our fingers are on the high sounding three strings just as with G and D and in this case we skip the fourth string. So, the thumb always plays the base note of the chord wherever that may be on the lower sounding three strings and fingers are always on the high sounding strings and remember to plant them before you begin to play.
►OKAY, I’VE GOT THAT – WHAT NEXT?
After you can cleanly play the above on several open chords the first thing you want to do is to put them back to back evenly on the same chord. So thumb, index, middle, third, thumb, index, middle third, or in musical terms 1 + 2 + 3 + 4 +. When you have that begin to change the chords but keep it slow so it’s always even and remember to plant the fingers.
Once you have the pattern you will want to move on to a new one. I would suggest beginning with a backward version of the first pattern so thumb followed by the above pattern backwards 3rd finger 2nd finger 1st finger but it really doesn’t matter a whole lot what pattern you play. Just remember to plant the fingers and keep the right hand fingers on their assigned strings.
►SHOULD I REST MY LITTLE FINGER ON THE TOP WHEN I FINGER-PICK OR SHOULD MY RIGHT HAND BE FLOATING ABOVE THE GUITAR?
It depends. There are really two general approaches to this and then a lot of individual variation after that. In this YouTube video you can see Chet Atkins playing with his little finger resting on the top while Jerry Reed is floating above. Even though Chet happens to have an electric in this video he is playing with the same technique he would typically use on an acoustic guitar. This video is also great because you can see firsthand a superb guitar player (Jerry Reed) playing with a very strange right hand technique. A thumb-pick, and then no index finger at all (it’s rolled up in his palm) and then only second and third fingers. I wouldn’t recommend copying Jerry here, but is a great example of why the answer to every guitar question is “it depends”….
►FINGERNAILS, FLESH, THUMB-PICKS AND DIFFERENT STYLES
Earlier I mentioned there are some common traits here even though there are no hard and fast rules. Here are some videos to finish up this article which demonstrate some of the different approaches to finger-style playing I’ve been discussing above.
Classical players never use thumb-picks. If you want to play classical, even very informally, don’t even think about it. Here is a great performance of a Villa Lobos Etude by Ana Vidovic , notice that even in this complex piece the thumb is still predominantly on the bass strings and the fingers are doing multiple patterns on the treble strings.
Playing with the flesh of the thumb and fingers in my opinion works best for bluesy roots style music where the snap you can get from the flesh can be very effective. Here is a guy who needs no introduction playing with no nails or thumb-pick – Mississippi John Hurt.
Playing with fingernails (with or without a thumb-pick) is going to be a must when you want speed and clarity. In this video I’m playing a G.W. Barry steel string guitar in a sort of quasi classical tremolo technique. I couldn’t imagine playing this without fingernails.
►Following here are four small videos I made which give you simple exercises to practise and help to get you going.
If you have any questions or wish to book a practical lesson, just contact me at The Twelfth Fret.
~David Martin, The Twelfth Fret

